Getting started with GTM Kit
Quick start
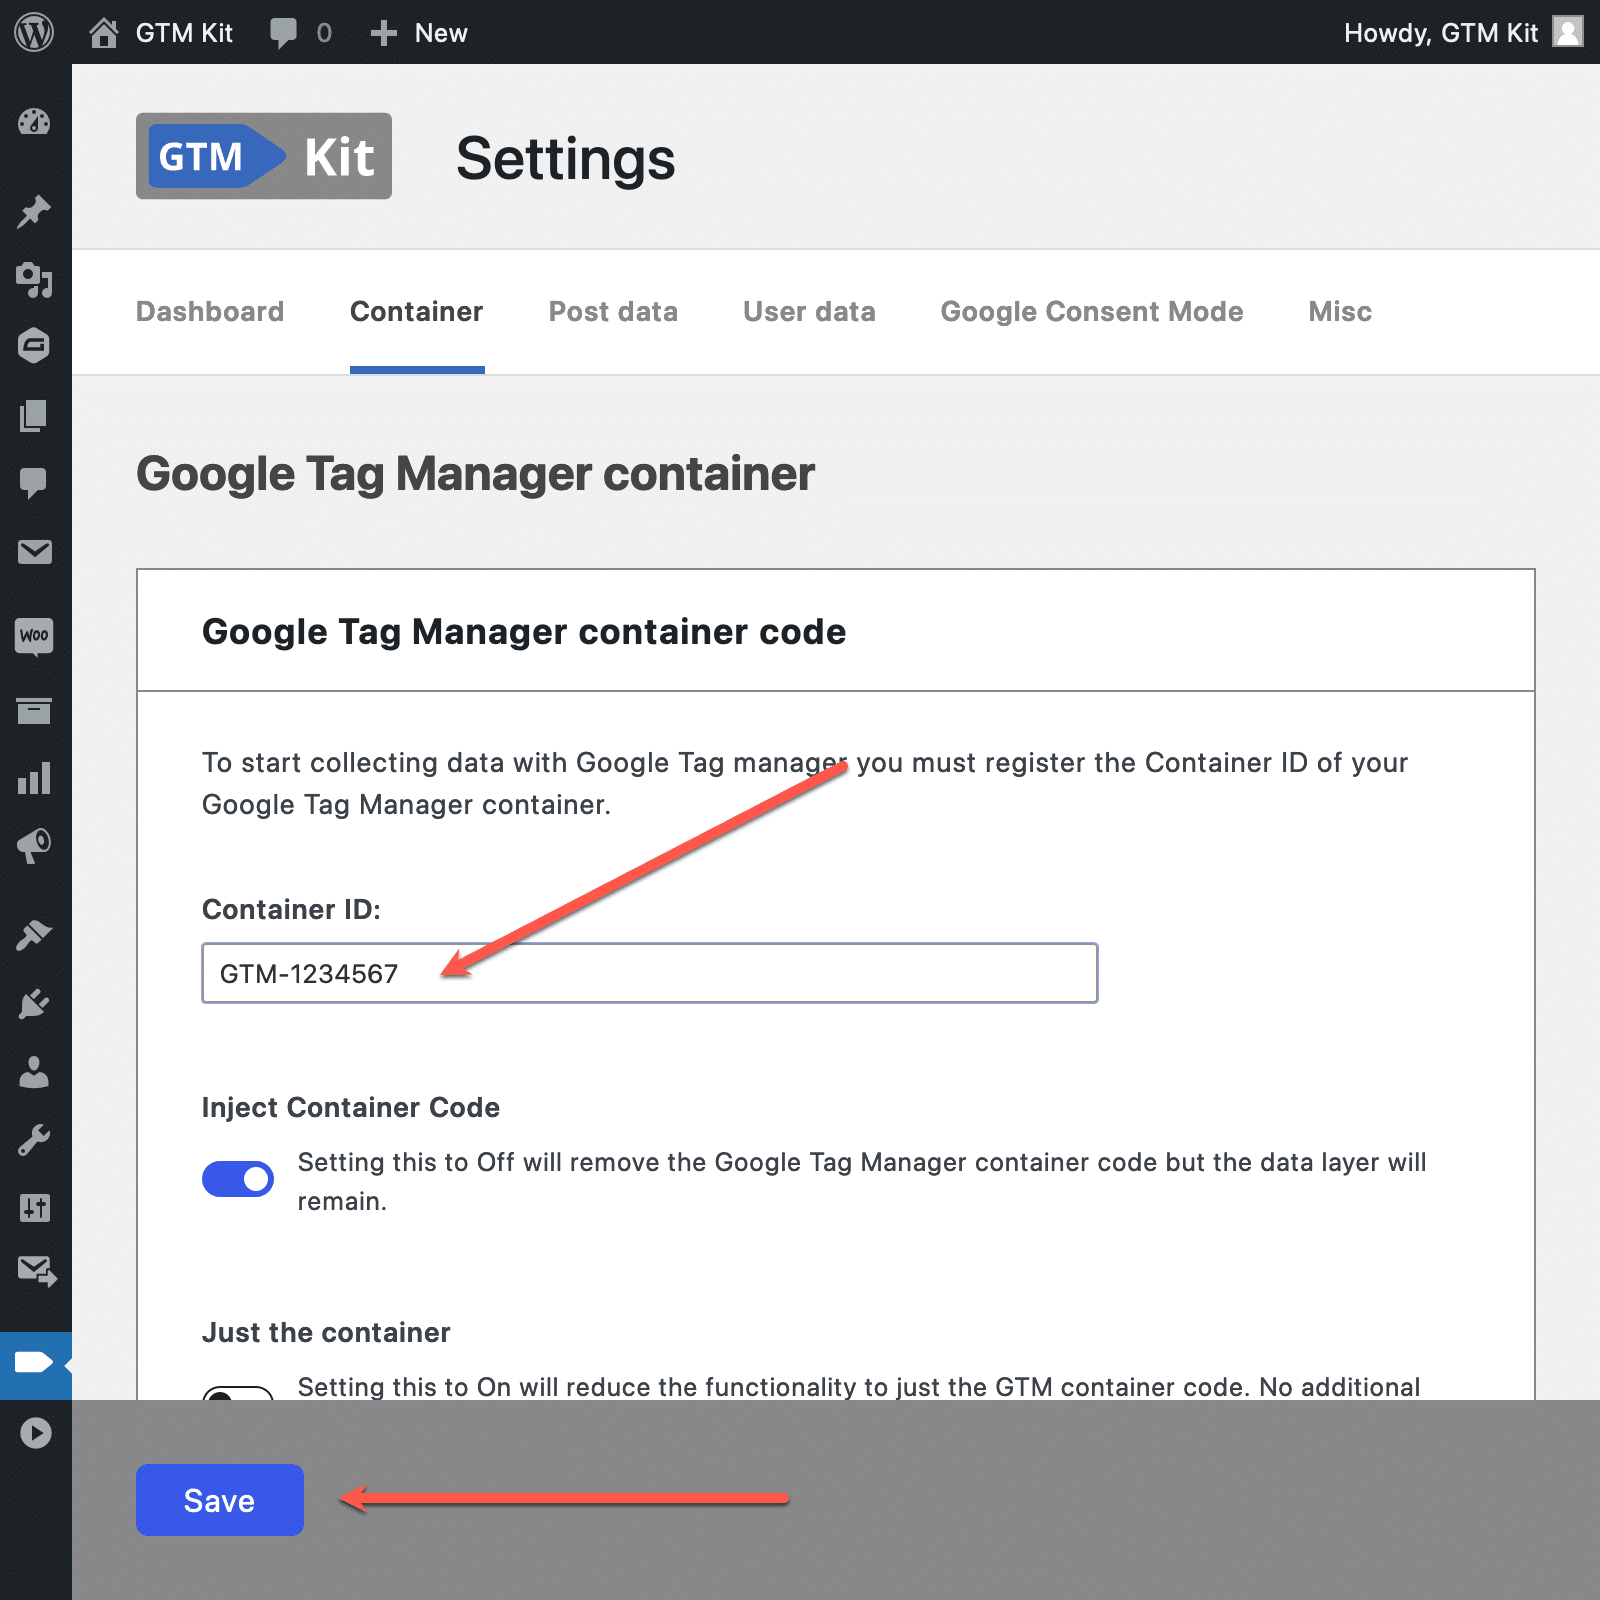
Once you have installed and activated GTM Kit all you have to do to get started is enter the Container ID, click the activation switch and click save!
Well you still need to choose which data you want to include in the Data Layer if any but the GTM container is active and you can start publishing tags in Google Tag Manager.
For now you don’t need to pay attention to the options under Google Tag Manager container code and GTM Server Side. Those options are for advanced implementations only.
Getting started
First things first – to use GTM Kit, you need to have a Google Tag Manager account. Since you are here you probably already have an account and if not, you need to create Google Tag Manager account.
If you have activated the contianer as explaned in the quick start section above you are ready to use Google Tag Manager.
However, the Data Layer doesn’t contain any interesting data until you specify which data you wish to include. This might be simple post data elements or data from WooCommerce.
If you want a fast website you should not include more data in the Data Layer than you really. It takes time to generate the Data Layer so think need to have before nice to have.
Post data
In the section Post Data you can specify which post data elements you wish to include in the Data Layer for use in Google Tag Manager.
Post type
The Post type is the WordPress post type. I.e.: post or page.
Page type
The Page type is in its simplest form the same as Post type. However, integrations may have their own defined page types like product, cart, checkout etc. This means that you can base trigger in GTM on a defined page type instead of a hard coded URL.
Why is this awesome? For example, the URL of the “order received” page may change with you knowing it but you don’t have to worry about that when you base your trigger on a defined page type.
You can define custom page types on a page-level in the post sidebar:

Categories
Include the Categories of the current post or archive page.
Tags
Include the tags of the current post or archive page.
Post title
Include the title of the current post/page.
Post ID
Include the WordPress Post ID of the current post/page.
Post date
Include the post date when the post/page was published.
Post author name
Include the post author name of the WordPress user who published the post.
Post author ID
Include the post author ID of the WordPress user who published the post/page.
User data
In the section User Data you can specify which user data you wish to include in the dataLayer for use in Google Tag Manager.
Be aware that including user data is not compatible with full page caching. Full page caching will make the content of the page static including the Data Layer data. This means that is not possible have data in the datalayer for the individual user. In other words – it’s the same for all users.
There are ways around this, but it depends on the chosen cache solution and is only for advanced users.
The user data options are:
Logged in
Include whether the user is logged in.
User ID
Include the user ID if the user is logged in.
User role
include the user role if the user is logged in.
Integrations
GTM Kit integrates with the following plugins:
- WooCommerce
- Contact Form 7.
Under each integration you simply activate the integration by selecting Track WooCommerce or Track Contact Form 7 respectively. The are more options but this is realle all you need to do to get started.
Setup Google Tag Manager
Once you have configured GTM Kit you need to continue setting up the required tags in Google Tag Manager.